
I then began the hard part...First, I scraped off the top layer of grass & vegetation with a hoe. Then I began digging the holes with a pickaxe & shovel, giving the holes the form I wanted and packing up the dirt along the sides to form the walls of each pond. I was lucky that the soil was relatively moist and easy to dig, because it was the rainy season where I live(in Puerto Rico).
After the holes had the correct depth, I covered the bottoms and sides with some old linoleum tiles, to protect the plastic liner from being punctured by any looked-over rocks or burrowing critters.
I was able to get a large, left-over piece of heavy-duty, thick plastic sheeting that was used as temporary roofing on a neighbor's house after it was blown away in a hurricane a couple years back. I cut two pieces big enough to fit the holes I had dug and laid them in the holes, and began filling the holes with water. This helped hold the plastic in place; as each hole filled up I made small adjustments to the liner, smoothing out the wrinklesand folding the corners in and under:
In the middle, between the two ponds, there is a small channel or "waterfall" on the right side, to let water flow from the upper pond to the lower one, where the pump for the filter will be located. The water will flow from the pump to the filter, then trickle from the filter into the upper pond, then flow into the lower pond, and begin cycling again.
I fastened the liner to the ground using six-inch galvanized nails and washers, placed under the nail heads; the nails were hammered thru the plastic into the ground, helping keep the plastic in place:
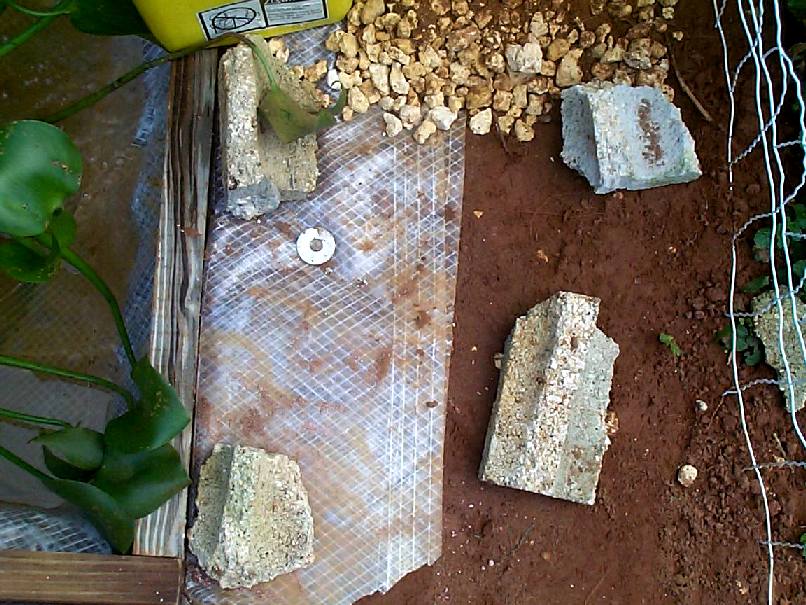
I also made a frame out of treated 2x2s, that fit the exact border of each pond. I cut the excess plastic off, leaving a small edge; this will be covered by landscaping bricks later on.