
 |
First, I would like to ask you to bear with me. This is my first Tutorial and sometimes I may explain too much or too little.
When I draw something I like to work in big spaces to have lots of room to move around. And before doing the last saving I resize it. The first thing you have to decide is what colour you will do your rose as there are so many colours of rose. It can be pink, white, cream with pink shadows, orange,blueish, yellow, red etc... Now, pick a colour for your background that contrasts with the colour of your rose. Usually, the best is grey but never use the grey from the black range, find a blueish, greenish, redish, or yellowish grey. It will look better. The colour I used is # A0ADBF ( R=160 G=173 B=191). |
 |
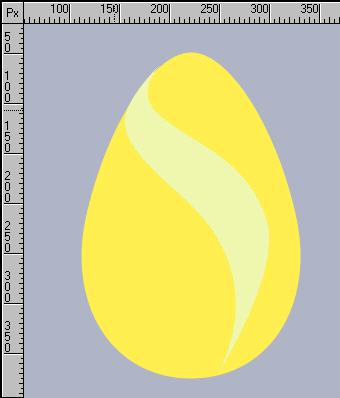
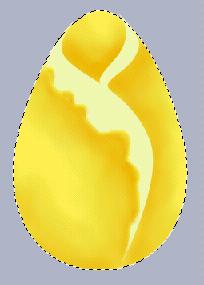
Using the Path Tool, draw an ellipse, 2D object, colour= R=245 G=255 B=60, Hex="#FFF53C".
Using the Transform Tool (perspective) change the ellipse so you have an egg shape. |
 |
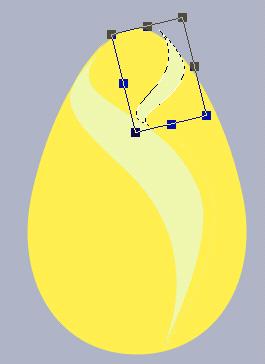
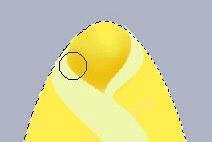
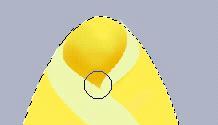
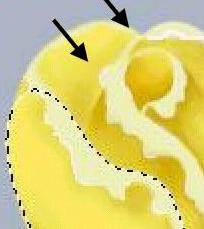
Now, we are going to paint the "turned out" part of the petal. You can either paint it freehand or using the Path tool (shape Wave 1). The colour used for this is a cream colour (R=240 G=254 B=162 Hex=#F0FEA2). If you use the Path tool, you will have to use the 3D Ball to change the shape a bit. You can see the 2 spots where I used the 3D Ball: the black "x" is where I first clicked the 3D Ball and the red "x" is where I dragged it to. |
 |
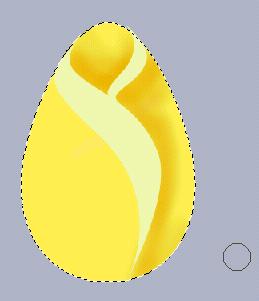
This is what you should have. |
 |
Right-click on it and duplicate this new shape to make the top one. Get the new one, flip it vertically , resize it, and put it in place over the first "turned out"part. Don't worry for now with the lacey like border of these 2 parts, we will do them later. |

|
We will have to start painting the shadow between the 2 parts, before going on with the lighter parts.
Click on the yellow shape. With the Paintbrush. size = 34, colour (R=235 G=176 B=0, Hex=#EBB000),Transparency=85, Soft Edge=75, paint around the edges of the two lighter shapes going up in the middle. Paint again near the bottom borders to build up the shadow. |
 |
When you paint near the borders make sure to go on the lighter shapes in order to have a well-defined edge. Keep painting it for 3 times more but just around the bottom edges. |
 |
You should have this now. |
 |
Now we will do the right side shade. Paint the same as you did with the first one. Always building up in value, until you get this |
 |
Now with this one we will have to smudge it so it looks smoother. With the Drop Water brush, size=35, Transparency=50, Soft Edge=70, start applying it in the lighter edge of the shadow. Don't drag the brush, just do small clicks., it is easier this way. Apply it until you are happy with the result. It doesn't need much. |
 |
In order to do the left side you will need to erase some parts of the shape, so to have a lacey like effect on the edge of it. Click on it to make it active. Using the Paintbrush, size 8 transparency=0 soft Edge=0, and the yellow, paint little dents on it. |
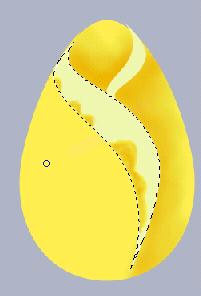 |
Change the colour to the shadow one (R=235 G=176 B=0, Hex=#EBB000) size=34 Transparency=85 Soft Edge=75, keep the shape active and paint near the edge that you had just cut. |
 |
Click on the yellow shape to make it active.We have to complete the shadow going down on the shape.Paint two stripes one beside the other. On the first one , paint twice and on the second stripe paint once. Click On the lighter shape holding down the Ctrl key to have both active, combine as a single Object. |
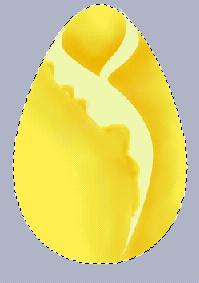 |
Now, we will use the Drop Water to smudge the 3 stripes of paint to look as if fainting down. Paint a little more near the lacey border to darken it a bit. Smudge with the Drop Water brush. |
 |
At the bottom of the egg shape, paint a shadow, going up a bit. |
 |
Click on the small light shape and combine as a single object with the rest. We will paint the lace on its edge. Paintbrush, size=11, Transparency =0 Soft Edge=0. |  |
Let's do the hightlights, Paintbrush, size=2, Transparency=0 Soft Edge=20, colour white. Zoom in to place it better. Paint around the edges of the lighter parts in some places. |
 |
Here is the finished rose button. With this object you can add some leaves and just make a button or you can go on adding some petals to make an open rose. |
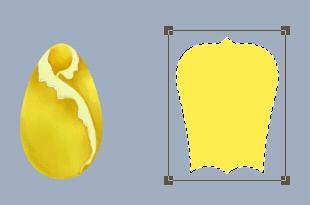 |
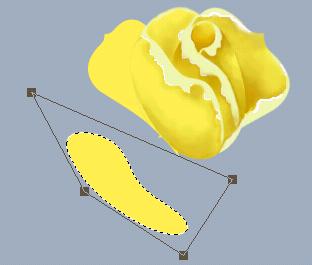
Using the Path Tool, shape="Shield 2",
D Object, and with the medium colour (R= draw a shape of the same size as your button.
Transform Tool - Flip vertically. Using the Perspective Tool change the bottom. Now, it is good to duplicate this form as you may use it for other petals. |
  |
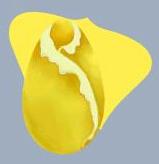
Click on the button and bring it forward, put it on top of the petal.
Activate the petal, using the Transform Tool (distort)close the bottom, with the 3D Ball, place the cursor on black "x" drag to red "x". With the Distort Tool, close the height a bit on the right. |

 |
Use the Rotate Tool to turn it a little.
Paint the "turned out" part, paintbrush, size=8 transparency=0, soft edge=0 and the cream colour(R=240 G=254 B=162). Paint it freehand, start on the border. We are going to paint it in layers so keep both objects separate. Activate the button and complete the line of the "turned out" part as if it were wraping around the button. |
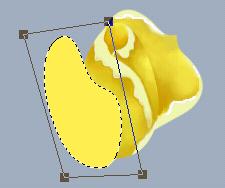 |
With the Path Tool make a new shape, now using the "Palette" shape. Cover the little hole with a circle and "Combine both as a single Object". Duplicate it as you might use it again.
Flip it horizontally and put on top of the others. Using the "Distort", the Perspective" and the "Slant" transform it until you get this shape. |
 |
Duplicate it, put one in the back of everything and keep one in front. Turn the back one upside down, and arrange it until it looks as one with the petal in front. |
 |
Click the front shape to make it active. Paint the "turned out" part and the shadow on this shape. Click on the one in the back, paint a shadow where it is marked and complete the turned out part of the front petal. (marked with a circle) |
 |
Paint points of the sdjoining petals as if they were coming out over the back petal. |
 |
Get one of the first petals (Shield shape), using the 3D ball and the Distort Tool change it a bit and send it to back. |
 |
Get one of the Palette shapes, distort it and put on top of everything. Paint as you did with the others one. |  |
Paint a point of the adjoining petal coming out over the one you are working on. |
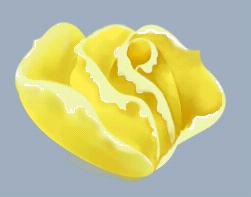 |
That is it !!!! You have a rose ! Open the Easy Palette, Layer Manager, click in all parts and "Combine as a single Object". Now we need to add some leaves and a stem. |
 |
With the Path Tool, choose 2D Object, and a nice dark green, Custom Shape= Crown. |
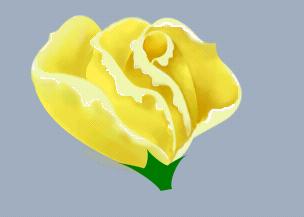 |
Using the Transform Tool, change it a bit. Put it on the bottom of the rose on top of everything. |
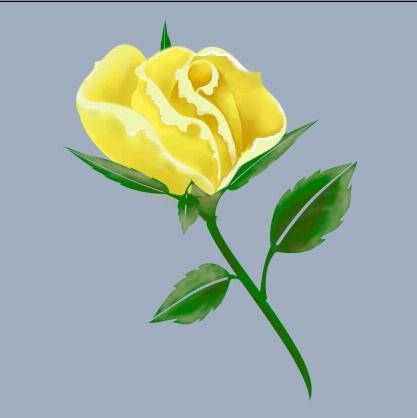 |
Pick the Path Tool, shape "wave 1", 2D Object, the same gree, and draw the stem. Stretch it and make it slimmer with the Distort Tool.
Make the leaves with Shape Leaf 5. Distort them, stretching to make them appear as thin leaves. Put them around the rose. Shadow with a darker green, and highlight them just around the rims. Make 2 other leaves and attach them to the stem. Shadow and highlight them. |
|
Before you merge everything, paint the background, to make a shadow behind the rose. Make sure you dont have anything active.
With the Paintbrush, the largest you can get,, Transparency=90, Soft Edge=100, start in the middle and go to the borders of your picture. Make the shadow under the rose the darkest. Now all you have to do is proudly sign your work. |


